
Here’s a pattern appliance techs see every year. Somewhere around October, somebody’s dryer starts taking two cycles to dry a load of towels. They shrug, hit start again, and figure it’s just getting old. A few weeks later it stops heating completely.
More often than not, the dryer didn’t just get tired. It was choking on its own lint, and eventually something inside gave up to protect itself.
Fall is the right time to deal with this. Heavier clothes, more blankets, and more loads mean the dryer works harder, and according to the U.S. Fire Administration, home dryer fires climb in the fall and winter months. The USFA estimates around 2,900 home clothes dryer fires a year in the U.S., and the leading cause is simply failing to clean them.
So let’s go through it in order: the vent, the no-heat problem, and the parts that tend to go first.
Step one: check the vent before you blame the dryer
Your dryer pushes hot, wet air out through a duct to the outside of the house. Lint that escapes the lint screen builds up in that duct over time. As the airflow drops, the dryer gets hotter inside, clothes take longer, and the safety devices start to kick in.
Some signs your vent is clogged:
- A normal load needs more than one cycle to dry.
- The top of the dryer or the clothes feel unusually hot.
- The laundry room feels humid or warm while the dryer runs.
- You notice a faint burning smell.
- The flap on the outside vent hood barely opens, or doesn’t move at all, when the dryer is running.
That last one is the easiest test. Turn the dryer on, walk outside and look. With a healthy vent you should feel a strong, warm stream of air. If it’s weak, you’ve found your problem, or at least the start of it.
How to clean a dryer vent yourself
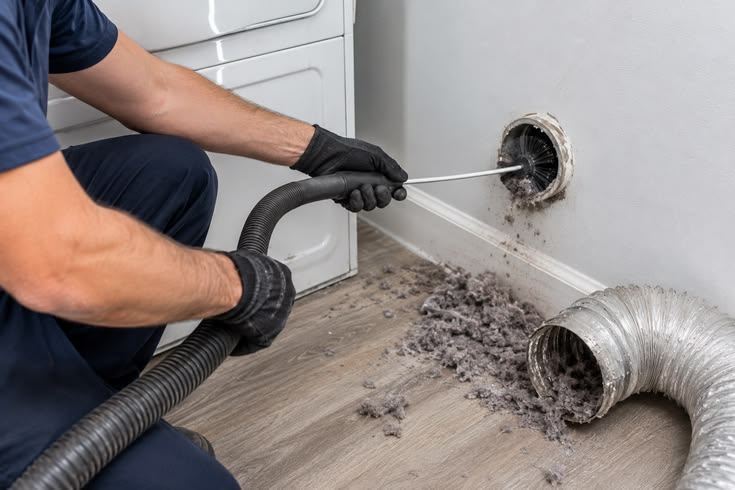
You can hire a vent cleaning company, and for long runs through an attic or up to a roof it’s worth it. For a typical setup where the dryer vents straight through an exterior wall, a DIY kit with flexible brush rods that attach to a drill does a solid job.
- Unplug the dryer. If it’s gas, turn off the gas shutoff valve behind it.
- Pull the dryer away from the wall carefully and disconnect the duct from the back.
- Vacuum out the dryer’s exhaust port and the lint screen housing. You’d be amazed what hides down in that slot.
- Run the brush through the duct from the inside, then from the outside hood, until it comes out clean.
- Clear any lint, leaves or nests from the exterior vent hood and make sure the flap swings freely.
- Reconnect everything, push the dryer back without crushing the duct, and run it on air-only for a few minutes to blow out loose debris.
While the dryer is pulled out, take a hard look at the duct itself. If it’s the white vinyl or thin foil accordion type, replace it. That stuff sags, traps lint and can melt. Rigid or semi-rigid metal duct is what you want. Keep the run as short and straight as you can, too. The building code most U.S. towns follow caps a dryer duct at 35 feet, and you lose length for every bend. Many dryer manuals set an even shorter limit, so check yours.
Step two: the dryer runs but won’t heat
If the vent is clear and the drum still spins with no heat, the cause depends on whether you have an electric or a gas dryer.
Electric dryers
Start with the simplest thing: the circuit breaker. An electric dryer runs on a 240-volt circuit with a double breaker. If only one half trips, the motor can still turn the drum, but the heating element gets nothing. Flip that breaker fully off and back on before you open anything up.
If that doesn’t do it, these are the usual suspects:
- Thermal fuse. This is a small, cheap safety part that blows when the dryer overheats. On many models a blown fuse means no heat; on others the dryer won’t start at all. And here’s the catch: if you replace the fuse without fixing the clogged vent that made it blow, the new one will blow too.
- Heating element. The coil can break, especially on older dryers. Sometimes you can see the break. A multimeter continuity test will tell you for sure.
- High-limit or cycling thermostat. These control and cap the temperature. When one fails, you can get no heat, or heat that cycles on and off at the wrong times.
Gas dryers
Gas dryers use an igniter to light the burner, and the failures are a little different:
- Igniter. If it doesn’t glow at all, it’s likely cracked or burned out. This is one of the most common gas dryer repairs.
- Gas valve coils. If the igniter glows but the flame never lights, or lights and then goes out, worn gas valve solenoid coils are a frequent culprit.
- Flame sensor. This part tells the dryer the burner has actually lit. When it fails, the dryer can shut off the gas too early.
- Gas supply. It sounds silly, but check that the gas shutoff valve behind the dryer is fully open, especially if somebody recently moved the machine.
A quick safety note: if you ever smell gas, don’t troubleshoot. Leave the house and call your gas utility from outside.
The parts that tend to fail first
After enough years and enough loads, most dryers wear out in a predictable order. Heat-related parts break most often, and airflow problems speed them up. Mechanical wear parts come next.
| Part | Common symptom | DIY difficulty |
| Thermal fuse | No heat or no start | Easy |
| Heating element (electric) | Runs but no heat | Moderate |
| Igniter (gas) | Runs but no heat | Moderate |
| Drive belt | Motor hums, drum won’t turn | Moderate |
| Idler pulley | Squealing or screeching | Moderate |
| Drum rollers | Thumping or rumbling | Moderate |
| Door switch | Won’t start, light stays off | Easy |
The good news is that most of these are inexpensive and made to be replaced. The trick is getting the part that actually matches your dryer. Look for the model number sticker, usually inside the door frame or on the back panel, and snap a photo of it. Then you can look up the exact OEM part through a supplier like applianceparts4all, which carries genuine parts for Whirlpool, Samsung, LG, GE, Maytag and most other major brands and ships the same day on orders placed before 4 PM Eastern.
If you’re not comfortable with a multimeter, or the job involves the gas line, call a technician. There’s no shame in it.
Your fall dryer checklist
Print this, tape it inside the laundry cabinet, and knock it out in an afternoon:
- Clean the lint screen after every load. Wash it with warm soapy water every couple of months if you use dryer sheets, since they leave a film that blocks airflow.
- Vacuum the lint screen housing and the area behind and under the dryer.
- Clean the full vent duct, from the dryer to the outside hood.
- Replace any vinyl or foil accordion duct with metal.
- Check that the outside vent flap opens freely and has no screen that can trap lint.
- Make sure the dryer isn’t pushed so tight against the wall that it crushes the duct.
- Don’t run the dryer overnight or while nobody’s home.
- Keep boxes, laundry baskets and cleaning supplies away from the back of the machine.
Frequently asked questions
How often should I clean my dryer vent?
At least once a year for most homes. If you have a big family, pets, or a long duct run, every six months is smarter.
Why is my dryer running but not heating?
On an electric dryer, check the breaker first, then the thermal fuse, heating element and thermostats. On a gas dryer, the igniter and gas valve coils are the most common causes. In both cases, a clogged vent is often what caused the part to fail in the first place.
Can a clogged dryer vent cause a fire?
Yes. Lint is highly flammable, and a blocked vent traps heat inside the dryer and duct. It’s one of the leading causes of home dryer fires.
Is it safe to replace a thermal fuse myself?
On most dryers it’s a simple, low-risk job as long as the dryer is unplugged. Just fix the airflow problem at the same time, or the new fuse will blow again.
One last thing
A dryer that takes forever isn’t a quirk you have to live with. It’s usually telling you something specific, and fixing it early saves you money, energy, and a much worse day down the road. Clean the vent this fall, and there’s a good chance your dryer goes back to drying a full load in one cycle.