
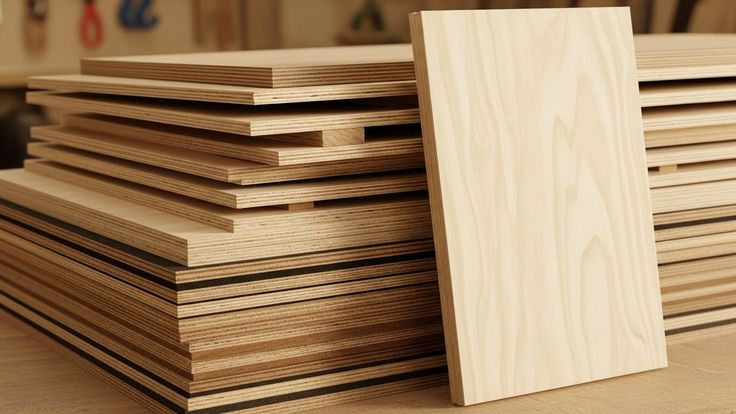
Walk into a newly fitted-out cafe, architect’s studio or boutique hotel lobby and there’s a good chance the walls are lined with plywood. Not rough builder’s sheeting, but warm, carefully finished timber panels with crisp joins and a grain pattern that runs across the whole room.
Interior designers have been moving away from traditional wall panelling, like painted MDF wainscoting, tongue-and-groove boards and solid timber cladding, toward decorative plywood. The reasons go beyond looks. Here’s what professionals wish more clients knew about the material, and how they’re using it in homes and commercial spaces.
It Gives a Timber Look Without the Solid Timber Problems
Solid timber panelling is beautiful, but it moves. Boards expand and shrink with humidity, which can open gaps, cause cupping or crack paint along joins. Installers allow for this movement, but it still needs managing.
Plywood is far more stable. Because it’s made of thin veneers glued with the grain running in alternating directions, each layer restrains the next. A large sheet holds its shape across seasons much better than a wall of individual boards.
Decorative plywood takes this stable core and adds a high-quality face veneer, such as oak, walnut, birch or Australian hoop pine. The result looks like premium timber but behaves more predictably on the wall. Designers also like that one sheet can cover a large area with a continuous grain, something that’s hard and expensive to achieve with solid boards.
Large Sheets Mean Fewer Joins and Faster Installation
Traditional panelling often involves dozens of individual boards, each cut, fixed and finished on site. Plywood sheets cover much more area at once, which can cut installation time significantly on large walls.
Fewer joins also means fewer places for dust to collect and fewer lines to line up. Where joins are needed, designers now treat them as a feature, using deliberate shadow gaps, routed V-grooves or slim aluminium trims to create a grid or rhythm across the wall.
For tight timelines, ordering plywood cut to size before it reaches the site is a common shortcut. Panels arrive ready to fix, with less on-site cutting, less dust and fewer offcuts going into the skip.
The Grain Pattern Is Part of the Design
One of the biggest shifts in how designers approach decorative plywood is the attention paid to veneer layout. On premium projects, panels are often grain-matched, meaning the veneer pattern flows from one sheet to the next. Some designers lay sheets out on the floor before installation and number them, so the finished wall reads as one continuous surface.
Veneer cut also changes the look. Crown cut veneers show the classic “cathedral” grain pattern, while quarter cut veneers give a straighter, more uniform stripe. Rotary cut veneers, common on birch and pine, have a broader, more varied pattern. Choosing the right cut is as much a design decision as choosing the timber species.
Edges matter too. Birch plywood is popular in contemporary interiors partly because its layered edge, with neat, even plies, looks good left exposed. Designers use that edge as a detail on shelving, reveals and window surrounds.
It Works in More Places Than You’d Expect
Feature walls in living rooms and bedrooms are the obvious starting point, but decorative ply is showing up in many other spots.
Ceilings are a big one. Plywood ceiling panels add warmth and help soften harsh, echoey rooms. Some designers use perforated or slotted panels with an acoustic backing to reduce noise in restaurants and offices.
Joinery is another. Using the same plywood for wall panels, built-in shelving, benches and doors gives a space a calm, unified look. Bedheads, reception counters, stair linings and wardrobe fronts all benefit from that consistency.
Commercial spaces like retail stores and offices use it for durable, easy-to-refresh wall linings. Damaged panels can often be replaced individually without redoing the whole wall. That makes plywood a practical choice for tenancies where the fit-out needs to look sharp for years but may be reconfigured when a lease changes.
What Designers Check Before Specifying It
Good results depend on a few practical checks. The first is the finish. Clear oils and hardwax oils bring out grain and give a natural, low-sheen look. Water-based lacquers offer more protection in high-traffic areas. Stains and tints can shift the colour, for example warming up pale birch or toning down orange in some species. Always test the finish on an offcut first, because veneers can take finishes differently from solid timber.
The second is fire performance. In commercial buildings, wall and ceiling linings have to meet fire hazard requirements under the National Construction Code. Some decorative plywoods can meet these with the right treatment or product, but check the specification early with your supplier and building surveyor.
The third is acclimatisation. Even though plywood is stable, it’s good practice to let sheets sit in the room for a few days before fixing, especially in new builds where plaster and concrete are still drying.
Installation Methods That Make a Difference
How panels are fixed affects both the look and how easy they are to maintain. Visible screws with neat washers suit a raw, industrial look. Concealed fixings, such as French cleats or adhesive combined with hidden brad nails, give a cleaner finish.
Mounting panels on timber battens rather than straight onto plasterboard leaves a small cavity behind the panel. This helps with alignment on uneven walls, allows room for cabling and can improve acoustic performance.
Allboard is one Melbourne supplier that stocks a range of decorative veneers alongside standard grades, which helps designers and builders compare species and cuts in person before committing.
Where This Trend Is Heading
Decorative plywood has moved from budget alternative to design choice in its own right. Designers value it for stability, speed of installation and the warmth it brings to a room, and clients appreciate a timber look that’s easier to maintain.
If you’re planning a renovation or fit-out, start by choosing where timber will make the biggest visual impact, then select a species and veneer cut to suit. Order a few sample panels, try your finish and see how they look under your actual lighting before you commit to the full wall.